Traditionally the words of software development, testing (also known as Quality Assurance), and the IT infrastructure needed to support such activities (often called Operations) were separate worlds. The developers would write code based on the requirements they were given, testers would test the features based on the same requirements (hopefully?!), and the IT staff would provide the computers, networks, and software needed by the two other groups to perform their activities. They would also be in charge of providing different environments (development, test, staging, production) that could be used by the development and testing teams.
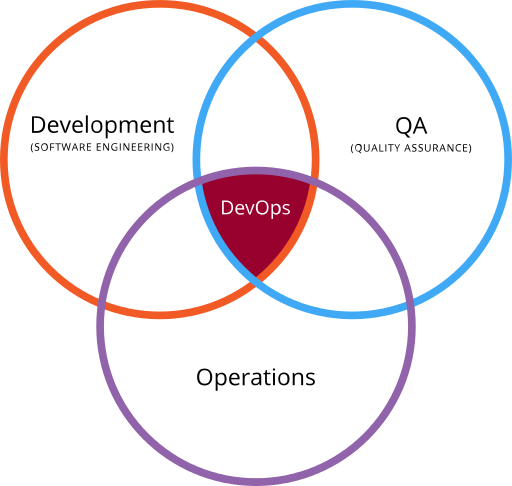
With the rise of agile methodologies such as Scrum, XP, and Kanban, these three separate “stove-piped” worlds could no longer exist. Thus, the term Application Lifecycle Management (or ALM) was the unification of development and testing into a single process, and the logical next step has been the unification of all three disciplines into a single integrated process called DevOps:
(By Devops.png: Rajiv.Pant derivative work: Wylve – derived from Devops.png: Link, originally by Gary Stevens)
The goal of DevOps is to automate as many of the steps as possible between an idea being formed and the finished code being released into production. This shrinks the time between someone coming up with the idea of a new product or business and the new product being available in the marketplace. This means that concerns such as provisioning servers and other infrastructure as well as scaling a successful application need to be as automated and seamless as the software development build process.
What are the Elements of DevOps?
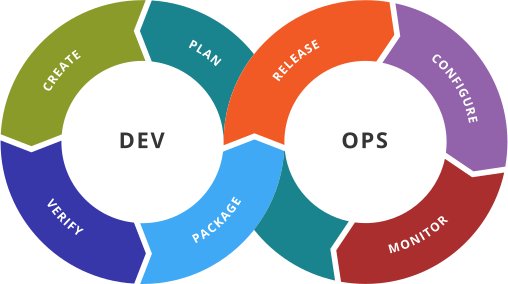
There are many different ways of categorizing tools that improve DevOps, however in general, it is recognized that the following seven areas need to be considered when looking for different tools that make up what is usually known as the DevOps Toolchain:
- Plan — Plan is composed of two things: “define” and “plan.” This activity refers to the business value and application requirements.
- Code / Build — code design and development tools, source code management tools, continuous integration / build servers
- Test / Verify — continuous testing tools and processes that provide feedback on business risks
- Package — artifact repository, application pre-deployment staging
- Release — change management, release approvals, release automation
- Configure — infrastructure configuration and management, Infrastructure as Code tools
- Monitor — applications performance monitoring, end-user experience
Now the relative importance of each of these seven items will vary depending on the type of application (web-based, mobile, legacy desktop, micro-services, AI, data warehouses), the methodology being used (continuous build and integration usually require an agile methodology), and whether the applications are in MVP, early adoption, mainstream adoption or support, and maintenance mode.
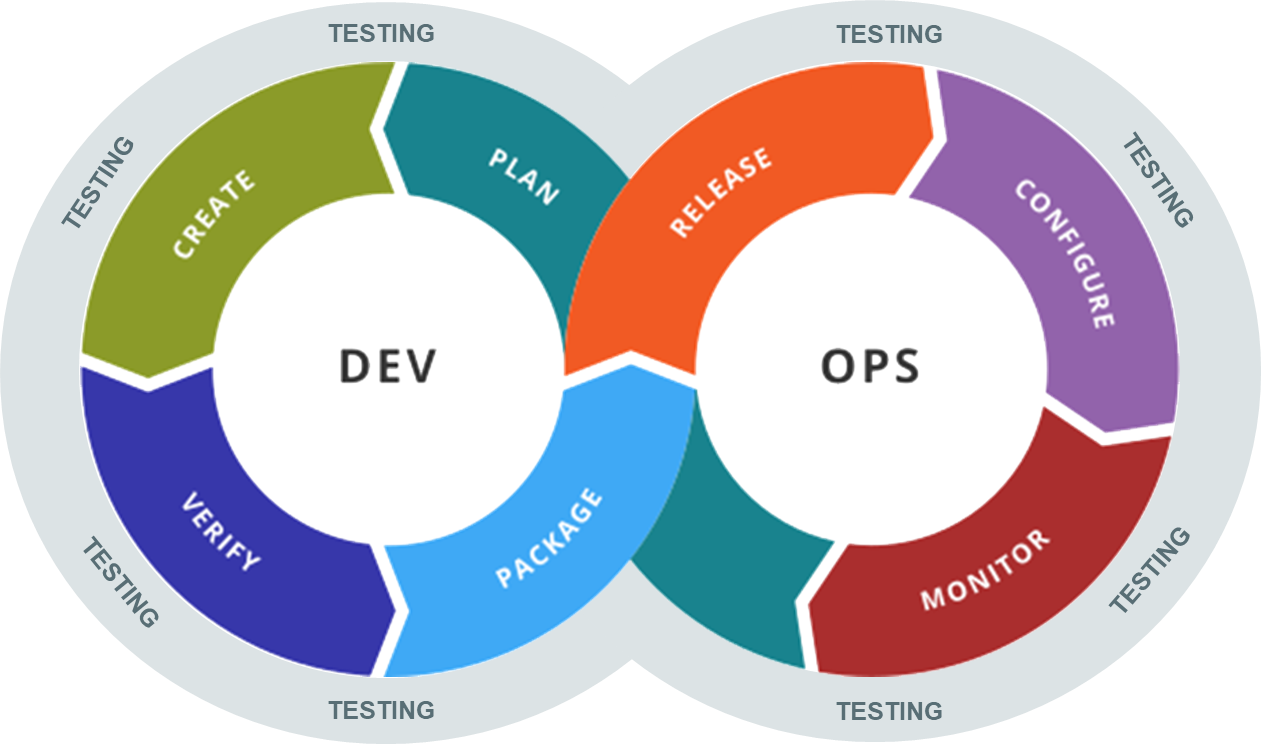
However, one of the criticisms of the term DevOps is that on the surface, it doesn’t contain a reference to testing or quality. This has led to increasingly complicated portmanteau’s such as DevTestOps, DevSecOps, DevTestSecPerfOps, each one trying to add different types of testing or quality to the phrase. However, in reality, when you actually start to look at each of the DevOps elements above, you quickly realize that, in fact, testing is everywhere.
We call this idea Continuous Testing, and it changes the traditional notions of what testing is and when testing should be done!
What is Continuous Testing?
Continuous testing is the process of executing tests as part of the software delivery pipeline to obtain immediate feedback on the business risks associated with a software release candidate.
- Originally limited to automated tests in the CI portion
- Should include all kinds of testing throughout the entire CI/CD pipeline
For Continuous testing, the scope of testing extends from validating bottom-up requirements or user stories to assessing the system requirements associated with overarching business goals and goes all the way to monitoring the system in production to find problems that need to be corrected.
Adding Continuous Testing to our DevOps diagram gives us this new way of thinking about software testing and how it first into the DevOps lifecycle:
As you can see, Testing is not limited to one specific phase of the pipeline but is an integral discipline throughout all the DevOps stages.
Shift-Left: Testing Early, in the CI Pipeline
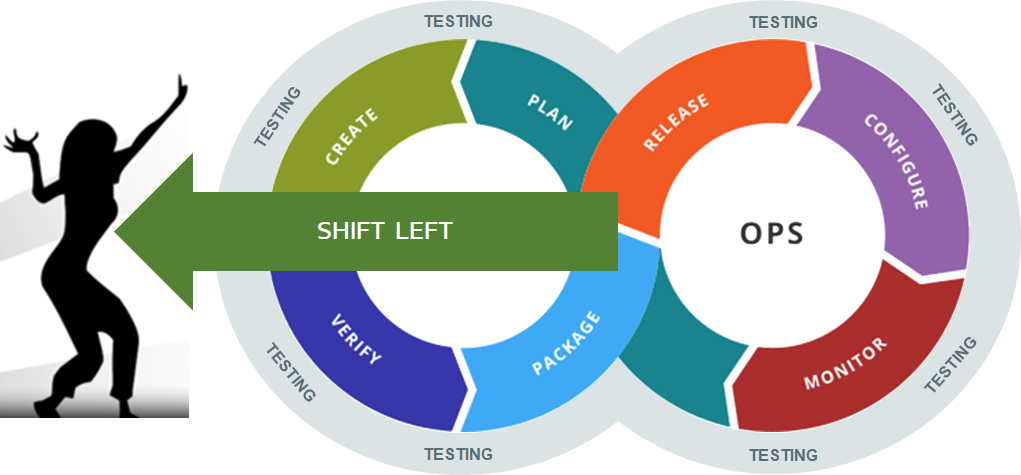
The first change in our thinking occurs when we look at the “left-side” of the DevOps diagram. The concept of “Shift Left” testing means to increase the amount of testing you’re doing on the left-hand side of the diagram. In this section, we will discuss how you can improve the testing being done during development in CI by adding early testing for functionality, usability, performance, security, and accessibility.
Shifting Left is about removing downstream blockers and finding and fixing defects closer to where they are introduced. When you are looking at ways to add testing to your CI pipeline, you should focus on the following general aspects:
- Rapid, automated testing to prevent previously known issues from reappearing.
- Identifying areas of risk earlier to know where to focus later testing.
- Do just enough of each type of testing early in the pipeline to determine if further testing is justified
- Early exploration of features to understand business issues/risks
The areas of testing that should be covered early in the CI pipeline typically include:
- Functionality
- Performance
- Security
- Integration
- Infrastructure
- Usability
In the next sections, we will cover these different areas in more detail.
Automated Functional Checking
In your DevOps Continuous Integration (CI) pipeline, we recommend that you have multiple layers of automated tests (often called checks) that verify that the application is working as expected from a functionality perspective. These are often called ‘checks’ rather than tests at this stage because they are mainly checking that the system behaves the way it is expected, vs. testing for new behaviours.
The different types of the automated test include:
- Unit Tests
- API & integration Tests
- User Interface Testing
Unit Tests
These are the initial building blocks of your automated testing infrastructure. If you are truly following an agile methodology, you should be using Test Driven Development (TDD) to ensure that all your code has unit tests written by developers before it is even written. However, even in cases where this is not feasible, we recommend making sure that all public methods and functions have at least one coded unit test associated with them.
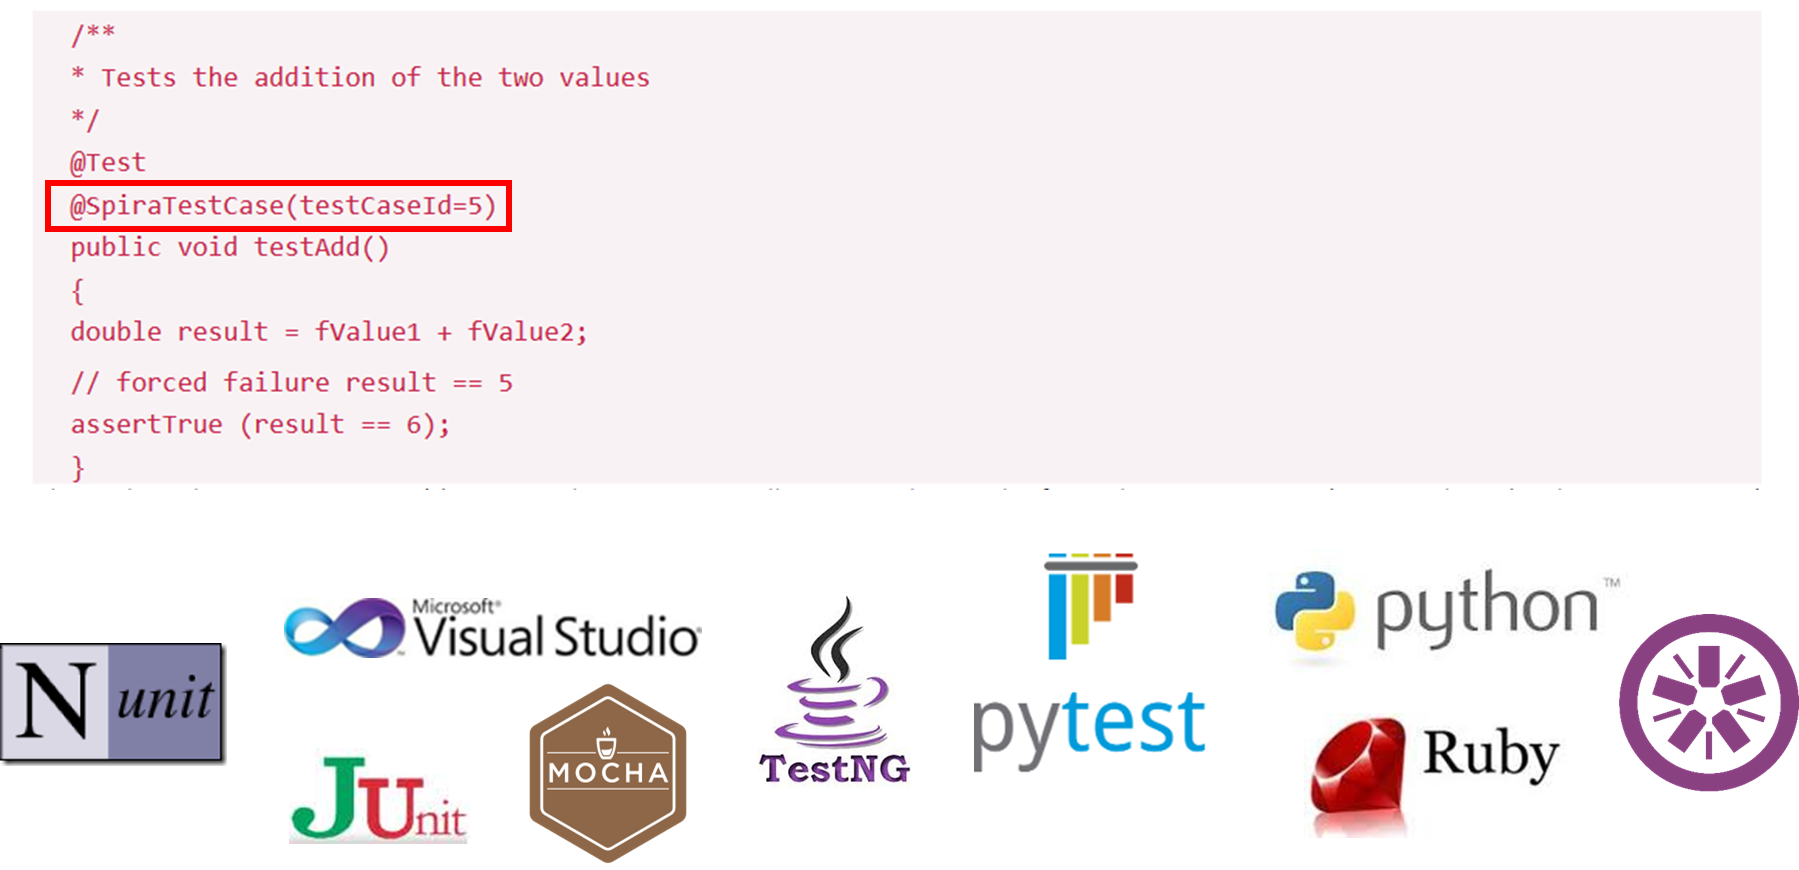
We recommend that you connect the different unit tests to a test management tool such as SpiraTest to make sure you get accurate real-time reporting of the test coverage with every CI build:
There are different xUnit testing frameworks for different languages, so make sure you choose the appropriate framework for your platform (NUnit, jUnit, PyTest, etc.) and that your developers are managing the testing code in the same SCM tool (e.g., Git) as your software code. The same best practices for having frequent code reviews and adhering to documented coding standards apply to your test code. As many leaders in the testing community advocate – “automated testing code” is “code” and should be treated with the same provenance and importance as the application code itself.
One of the dangers of unit testing code written by the developers is that they will only test the ‘happy path’ flows in the program, so we recommend that you have the primary developers write the initial unit test, which acts as a source of documentation for the code. Then have other developers / QA resources review the code and expand the coverage of the code in the unit test. Some common techniques for making sure your unit tests have good coverage include:
- Fuzz Testing
- Mutation Testing
API & Integration Tests
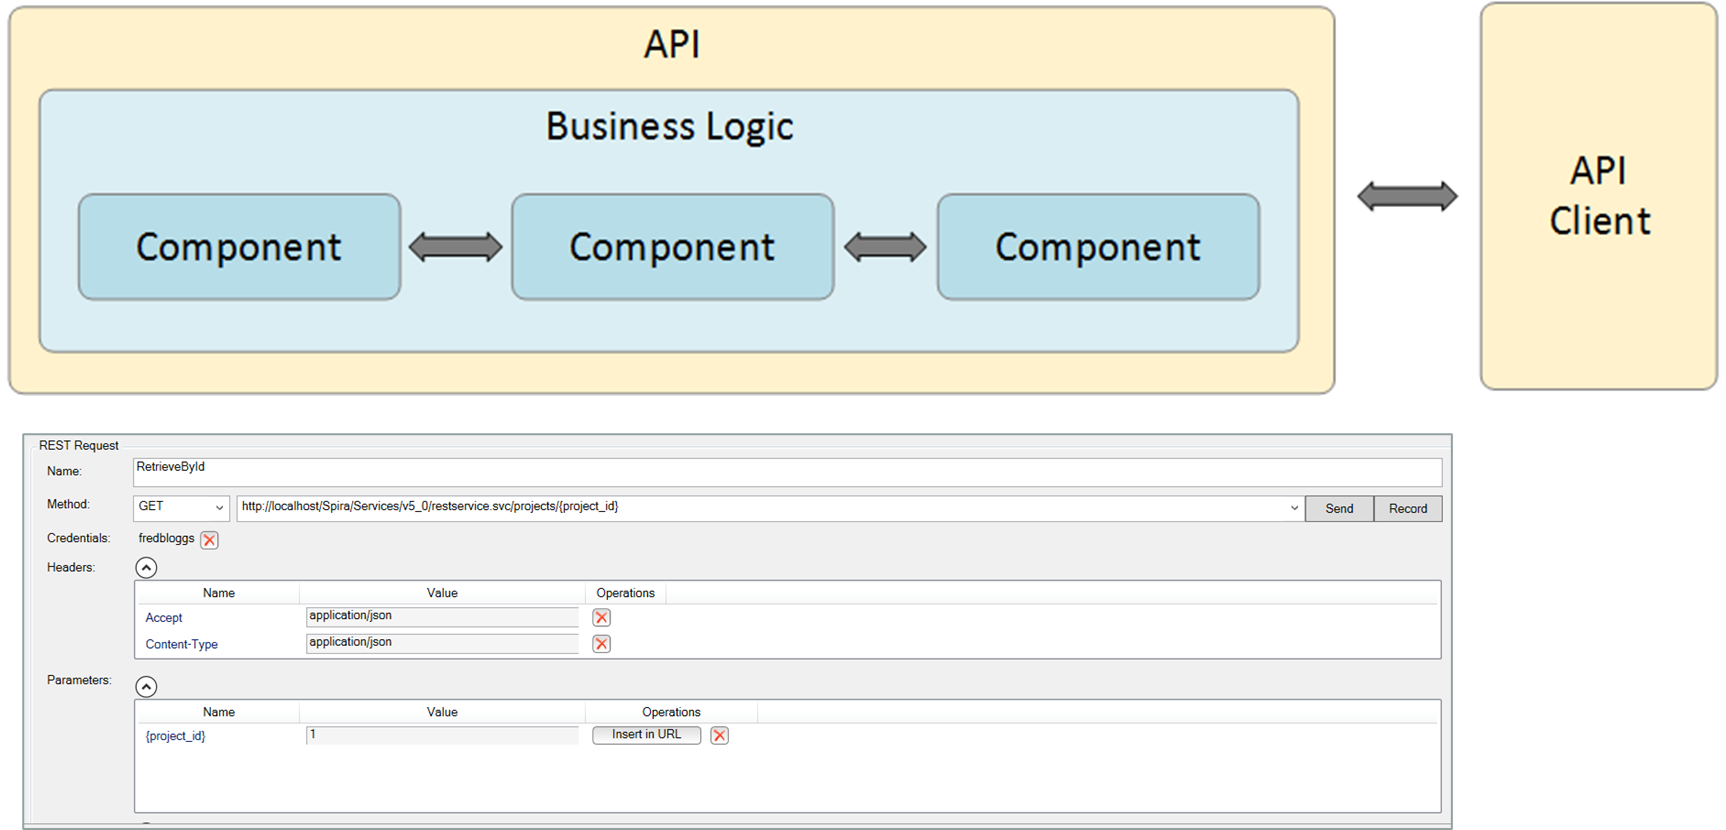
Since APIs are crucial interfaces that different parts of your system may rely on to communicate and also are often used heavily by external clients, having a repeatable, automated, robust set of API tests in your CI pipeline makes a lot of sense. Such API tests need to cover all the various versions and formats (REST, SOAP, ODATA, GraphQL, etc.) that are supported and be fast enough to be executed in every CI build.
In keeping with the philosophy of continuous testing, if you have any slower, long-running API tests, they should be kept outside the CI pipeline and run later in the DevOps cycle, potentially used only when one of the other earlier API tests indicates an area of risk to investigate.
In all cases, have the API tests integrated with your test management tool (such as SpiraTest) to ensure that any failures in the test are reported back against the appropriate release and requirements. This allows the impact of the failures to be visualized in real-time.
User Interface (UI) Testing
Typically, UI testing is something that is thought of as being an activity that should happen later in the DevOps lifecycle because the risk of application changes invalidating the testing (or breaking the tests in the case of automated UI tests) is greater at this stage.
Following the philosophy of Continuous Testing, we’d recommend that you conduct some UI testing in the early stages of the DevOps lifecycle, using that information to prioritize and focus later, deeper testing activities that happen later on.
For automated tests, we recommend using a tool such as Rapise that employs a codeless, model-based approach that makes writing initial tests and changing tests later easier. That way, when changes happen, you can adapt your tests more easily. In addition, for the “shift left” activities, we’d recommend writing automated tests that focus on simple high-level, repeatable tests that save time (e.g., logging in with every user, role, permission, and web browser) over deep, complex scenarios (creating a purchase order and receiving goods) that should be done later, when the application is more stable.
For manual testing, we’d recommend using rapid, exploratory techniques such as exploratory testing, session-based testing, where testers can follow high-level project charters to uncover potential issues and areas of risk. Later on, these insights can be used to focus deeper, more structured scenario manual tests on the areas that were uncovered.
For example, when doing exploratory testing, it was identified that the permissions checks seemed to be unreliable in some of the screens. Later on, in the DevOps cycle, these early insights could be used to have the testing team perform some more exhaustive testing on the authorization system. This early, rapid feedback lets you find the Rumsfeldian “unknown unknowns” that will otherwise come back to bite you later. We will cover this more later in the section on Exploratory Testing.
Continuous Integration (CI)
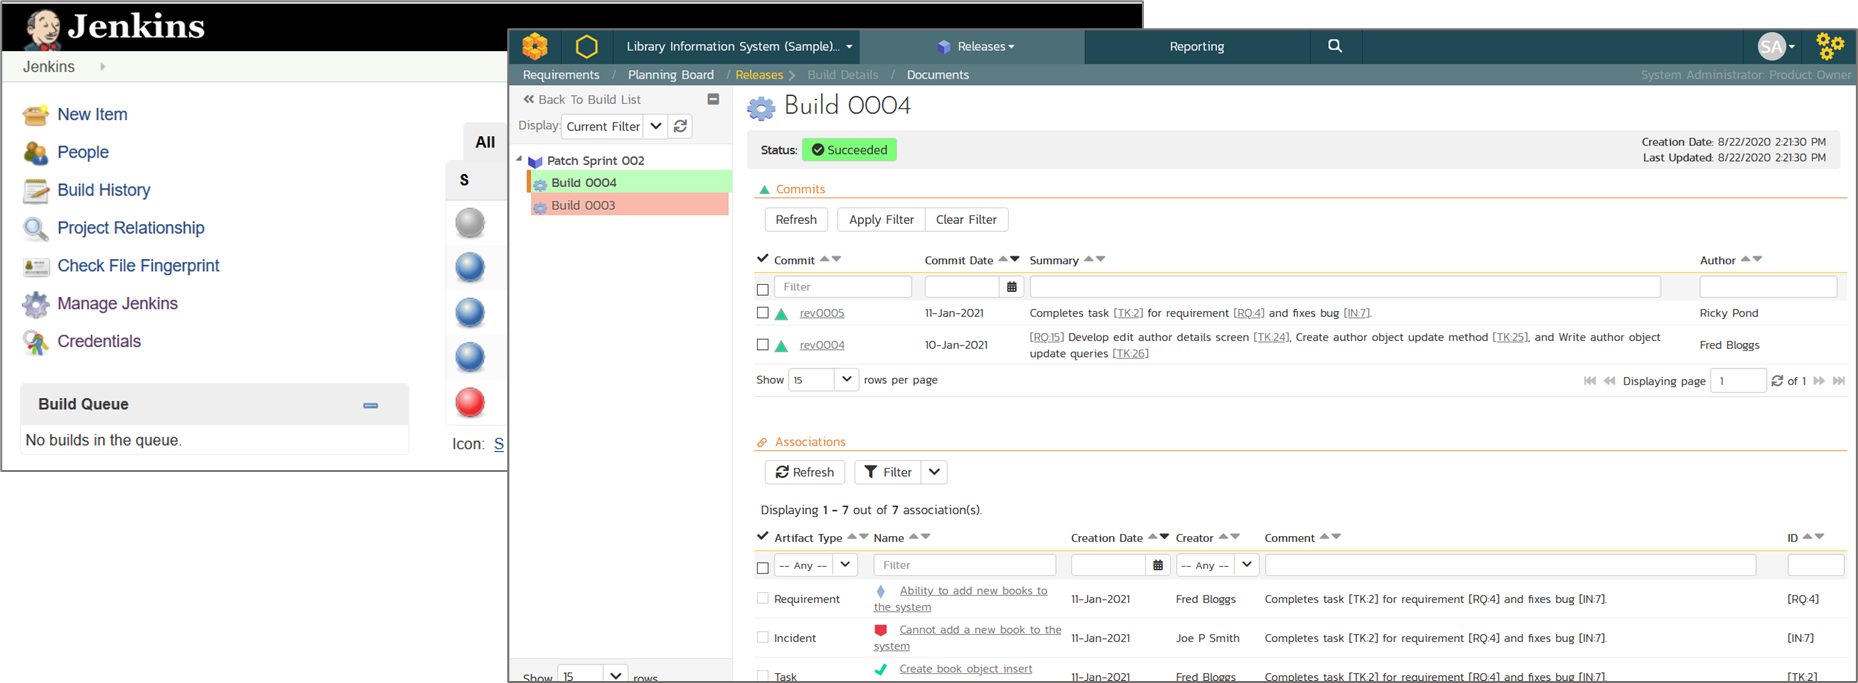
One of the assumptions we have made in the effort to “Shift Left” our testing is that we’ll be using CI automation tools such as Jenkins, TeamCity, or other DevOps pipeline platforms.
We recommend that you use the CI pipelines to orchestrate the various automated checks and have the CI pipeline report back into the same enterprise test management tool (SpiraTest) as the various testing frameworks that have been integrated.
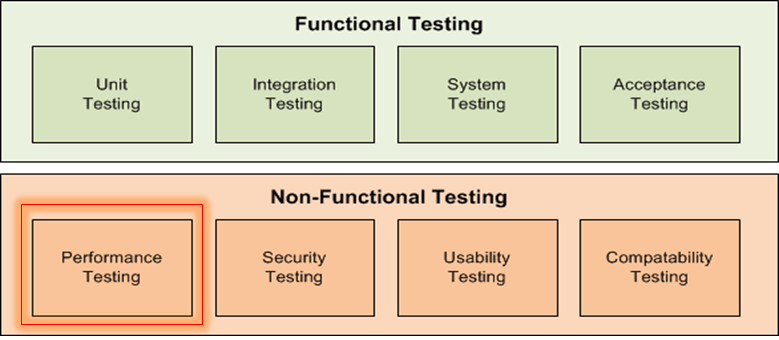
This approach of early feedback to inform later testing also applies to the realm of “non-functional” tests that traditionally have been done later in the lifecycle of the release. In adopting Continuous Testing practices, we need to understand how we can also “Shift Left” these activities as well.
Non-Functional Testing
Unfortunately, although great strides have been made with agile and DevOps practices to move testing further “to the left,” with unit tests and automated functional checks, the area of non-functional tests has tended to remain an activity done at the last minute, close to release.
With the adoption of continuous testing, we recommend the following approach be taken:
- Don’t leave these to the end of the process, before deployment
- Do just enough of each type of testing early in the pipeline to determine if further testing will be needed later.
Testing Early to Identity Risk
The key to being successful with non-functional testing is to avoid the two extremes: doing none of these tests until the system is developed and ready for deployment and doing all of these tests so that you don’t have enough time in the various sprints.
The key is to perform lightweight, rapid testing in each of these areas so that you can determine early which ones will need deeper testing later.
For example, if your early security scans determine that no material changes have been made to the system and the underlying libraries have no new vulnerabilities, maybe you can avoid a deeper penetration test later.
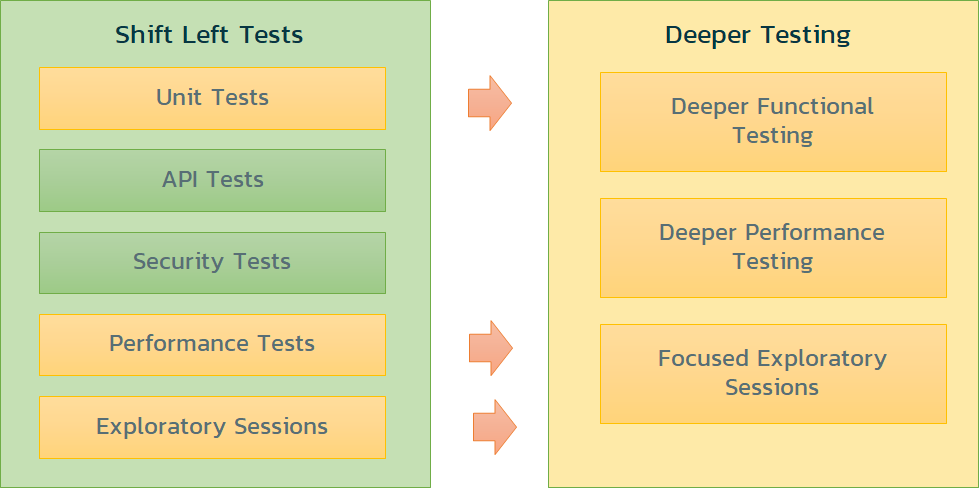
If you look at this approach as a general guideline, use each of your “shift left” tests to identify the areas of most risk, and schedule deeper testing (for later in the process) for only these areas:
Performance Testing
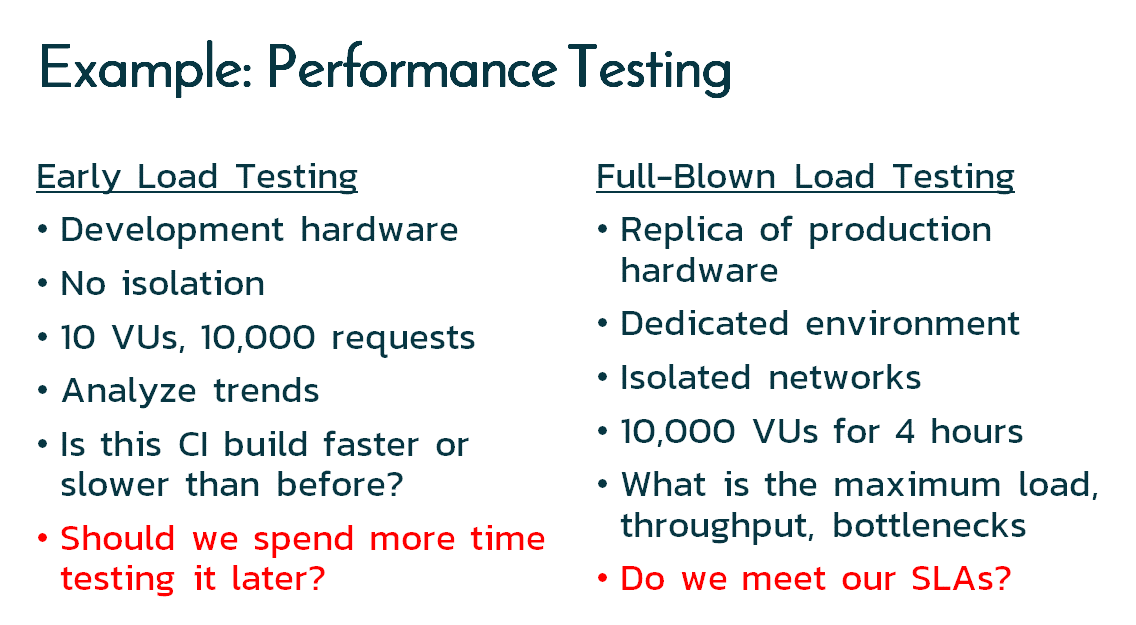
As another example, if we consider performance / load testing, we can compare the difference between what we might try and do in our “shift left” tests vs. what we’ll do later on:
For the early tests, we may not even need to use a traditional load testing tool; maybe just recording the build durations in our test management tool will be sufficient. If we see the build time on the same infrastructure take > 5% longer than the previous version, it’s time to do a load test later on with a more powerful tool such as NeoLoad or JMeter.
Security Testing
We have already mentioned this earlier, but in the same vein, for our initial early tests, we can run some simple, fast tools to check common issues:
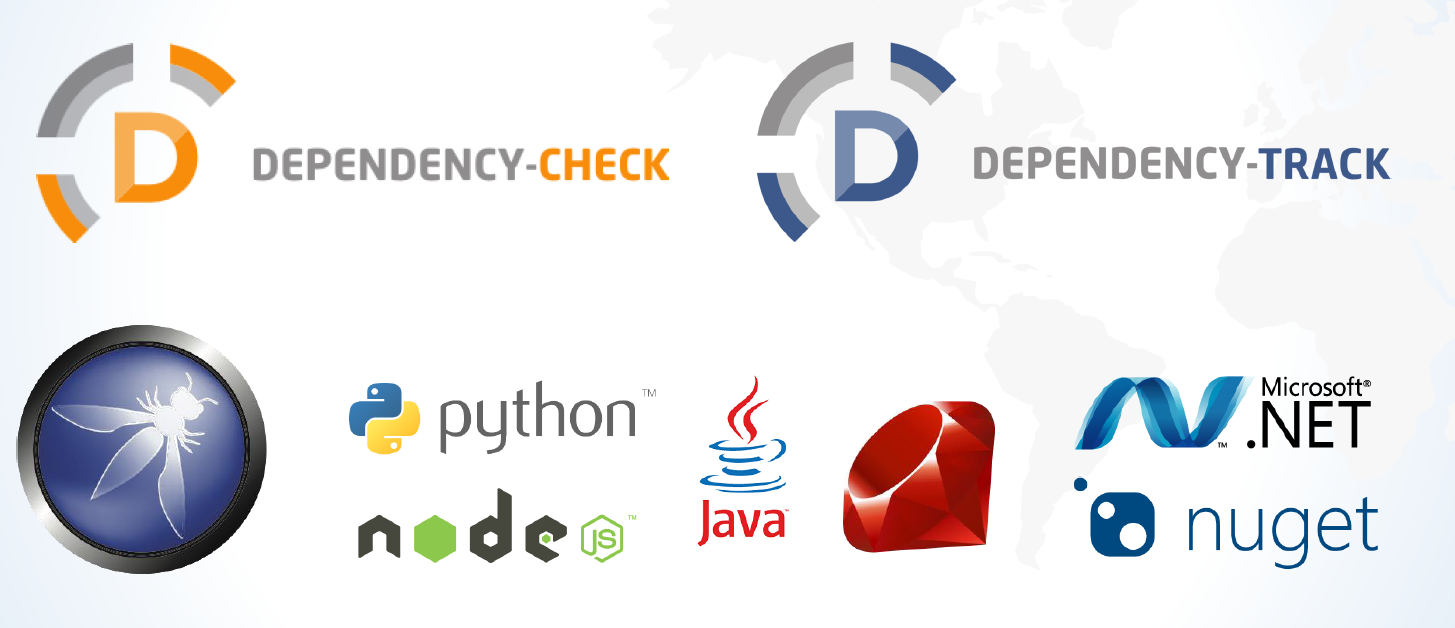
- Dependency Checking Tools
- Dependency Tracking Tools
- Library managers (Nuget, Maven, NPM, etc.)
- Code Analysis (SonarQube, PyLint, Visual Studio, etc.)
- Vulnerability Scanning (OWASP ZAP)
These will find common issues like out-of-date libraries, OWASP top 10 vulnerabilities such as XSS, SQL Injection, CSRF, etc., that can be easily addressed during development. These tools are also relatively fast and so can be incorporated into your CI pipeline.
In addition, they will also indicate where there are weaknesses that you can test for in your post-development testing:
- Use a PCI-DSS scanning tool to find any vulnerabilities once deployed on the production (or replica) environment.
- Schedule a manual penetration test (pen-test) using the results from the earlier automated tests to focus the pen-test on specific areas of weakness.
Usability Testing
Normally usability testing is something that is done towards the end of development once the UI is stable. However, we’d recommend conducting some usability testing on early builds, even if some of the data and screens have to be faked. That way, you can get early feedback on core UX elements such as navigation, screen layouts, etc., while there is still time to make changes without a lot of rework.
In accordance with the principles of continuous testing, this early UX feedback doesn’t mean you don’t do additional UX testing later on; it just means you can get some feedback earlier (before people get too attached to the design!).
Compatibility Testing
Another area of testing that can really benefit from the principles of continuous testing is the testing across different environments.
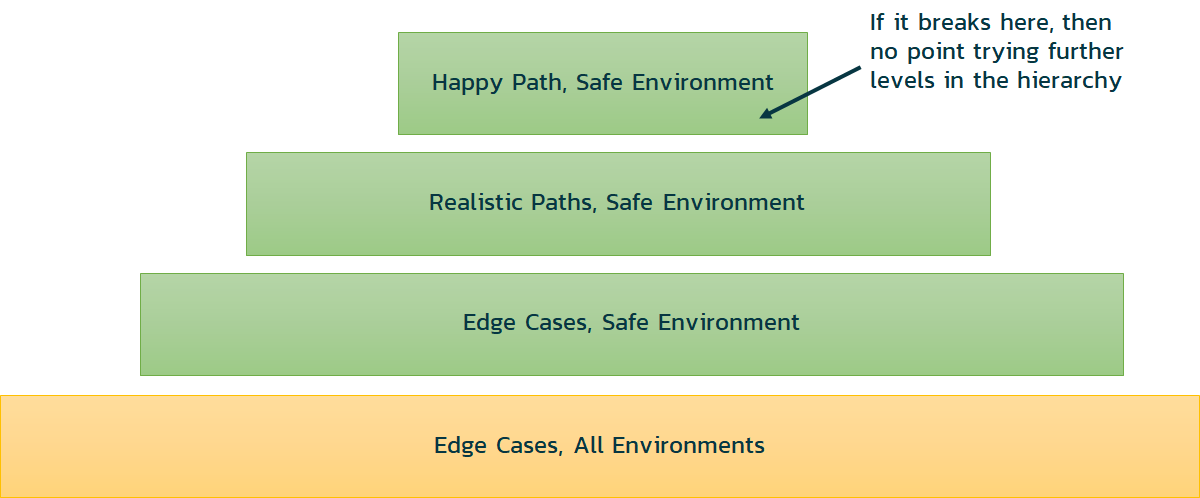
For example, it is tempting to take the latest CI build and try running it on the worst environment (IE11, for example) with an eye to breaking it by trying lots of crazy tests. However, if there are major bugs, it will be hard for the developers to distinguish if it’s the latest change or the environment that caused the problem.
So, we would recommend that you focus initially on testing the simplest use cases (aka the “happy path”) and use the same environment that developers were using (e.g., the Google Chrome web browser). That way, any bugs in functionality are truly due to code changes and not the environment.
You should also do some limited exploring using the other environments, perhaps try the “worst” environment (e.g., IE11) and see if there is anything different. In those cases, don’t log bugs; simply add them to the test plan for the later, exhaustive compatibility testing that you will be doing.
Exploratory Testing
It is an often-underappreciated fact that great testers find issues that no one knows about, the so-called Rumsfeldian (named after Donald Rumsfeld, Secretary of Defense) “unknown unknowns.” So even though you may have a great library of automated checks and manual test scenarios in your test plan, you need to always allow time for exploratory and other forms of unstructured testing.
This is because, when you are defining a system, you have the “box” of what are the understood and defined features:
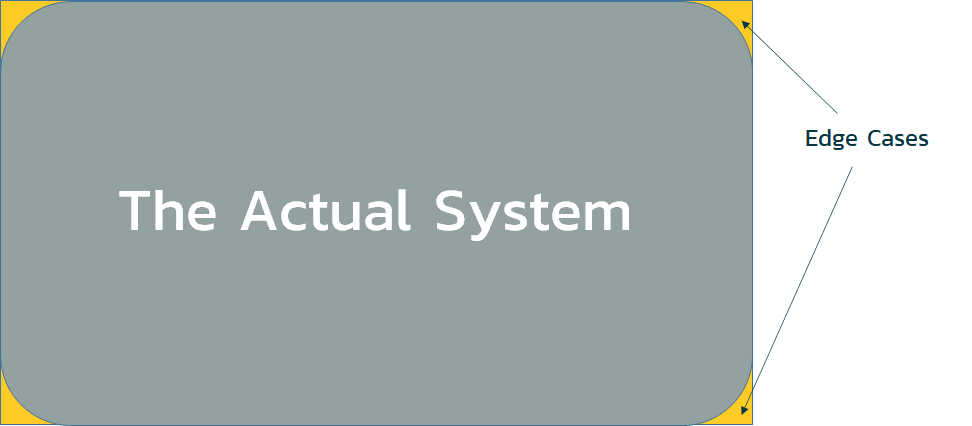
However, the actual system will have many small design choices, coding decisions, and other unappreciated changes that were made along the way. Agile methodologies avoid the use of long, prescriptive, “set in stone” requirements so that the team has the flexibility to make smart decisions in developing the system as they go along. That means the actual system looks like this:
Conceptually that means the actual system will not be a 100% reproduction of what was designed, so inevitably, even if you have the best test plan in the world, with 100% test coverage of all your requirements, there will always be ‘edge cases’ that need to be discovered and tested.
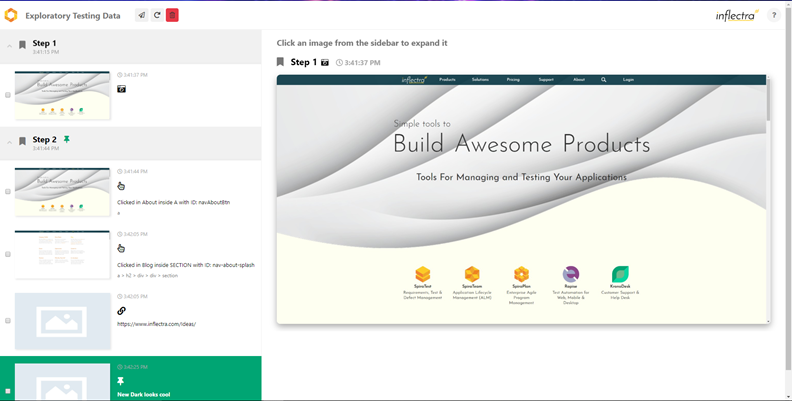
One of the benefits of exploratory testing is that it maximizes the cognitive abilities and human testers instead of treating them like machines (following a script). Exploratory testing is a great way of finding those edge cases, especially early in the sprints when functionality is being created/updated iteratively.
Exploratory testing should be done using a test management tool that has built-in support for exploratory testing, where you can document your findings in real-time, in conjunction with a capture tool that captures your sessions automatically.
The one recommendation we have for these early testing activities is to avoid labeling the findings ‘bugs’; typically, these early explorations may find observations that could be beneficial as well as harmful. You are basically looking for areas of risk and providing feedback to the development team. Much of what you may find may be known or intended, or if not, may be “better than what was intended.” We recommend you use project tasks to track these rather than bugs or issues.

