
How to Customise JIRA For Test Case Management
Learning how to create an CI environment to develop Jira products
First of all, I will put you in context: Jira is an Atlassian product, so we will use as “atlassian” products as we can, because all of this products are compatible between them and we will have the documentation localized.
The technologies I use to create an CI environment are:
- Jira: Environment where I will deploy my plugin.
- Bamboo: As CI tool.
- Node.js: Execution environment for JavaScript.
- Atlassian Connect Express: Tool to develop the plug-in.
- Mocha: Testing environment for Node.js.
Starting from the beginning…
You must have a space in my.atlassian.com. This will be the environment where I will deploy and test the plug-in. Its like an instance of Jira for us.
If you have never used atlassian-connect, you can get started reading this simple post to create the plug-in base.
Now, we will upload our proyect to GitHub to have a version control and then we will use it as a trigger to launch our tests.
… The testing side…
I usually make testing with Mocha (JavaScript). You can install it easy via npm. Mocha looks for the testing files in the folder named test as default.
I recommend to start with a simple test case and when we will have all the CI processes integrated we can start making hard testing.
… Welcome to Bamboo…
Bamboo is a powerfull continuous integration tool.
We must download the software from the Bamboo page. It will download a tomcat server with bamboo installed on it, so we will launch the server to go into Bamboo.
Bamboo looks like this:

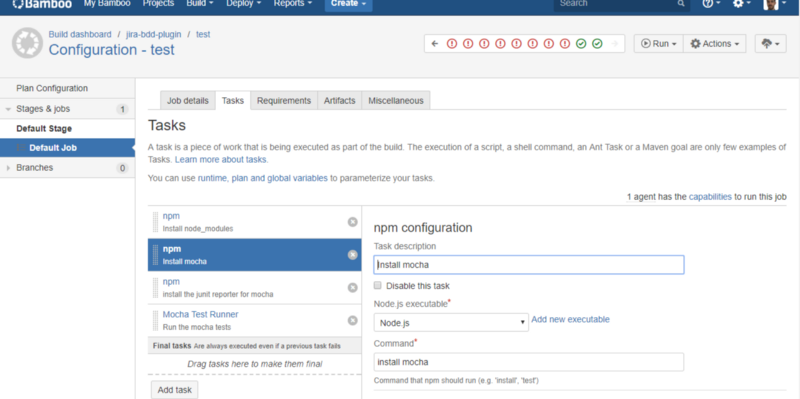
As a quick introduction to Bamboo: First of all, we should create a new proyect and configure a Plan Proyect (the Tasks). Inside a plan we can group the tasks in Jobs, so we will create a Job and then we will create tasks for the Job.
We can create many different type of tasks: shell commands, node commands, mocha, maven, npm, grunt commands…
Before start creating tasks we have to know that when we run the plan, Bamboo copies the code and files from the repository to a local folder named bamboo-home (this folder is created as default when we install Bamboo in the same path).
For example, I’ve configured the following tasks: installation of node modules, installation of Mocha, and test launch.
Now we can launch the plan. If everything went right, we will see a confirmation message, otherwise, we will have to dive into the generated log to find errors and fix them.
We can connect our bamboo proyect with the GitHub proyect and configure a trigger to launch the plan every time we make a pull in a branch.
My structure of branches is the following: from master derives test, and from test derives production. I will always make pulls to production. I will make pulls just from production to test. And this branch will launch the trigger in bamboo to launch the plan. If the tests pass, we will have another task configured to make a pull to master.
So we will always have a stable and tested version in master.
… Ending
When we have made a pull to the test branch and checked that the plan is automatically launched we can say we finished our continuous integration environment.